A browser
Chrome, Edge, Firefox or Safari, on any operating system. The lab runs in the browser — there is nothing to install.
Every SmarterLabs experiment runs on real hardware in a real laboratory. This is what happens between deciding you want to run one and downloading the measurements you took.
A complete 3-minute walkthrough showing every step from catalogue request to live workbench and CSV export.
Chrome, Edge, Firefox or Safari, on any operating system. The lab runs in the browser — there is nothing to install.
The workbench streams live waveforms from instruments as they measure. Steady matters more than fast.
Register with your institutional email. Access to each experiment is granted per lab, so you request the ones you need.
Steps one to three happen once per experiment. After that you can book a slot whenever you need one, for as long as your access lasts.
Register and confirm your email address. Signing in takes you to your dashboard, which is where everything below starts and finishes.
Browse the catalogue, read what each experiment covers, and request the one you need. You are asked why — a first attempt, a retake, more time, or a session you missed — so the request can be judged fairly.
Requests are reviewed by lab staff and you are emailed the outcome. Approved experiments appear under Accessible labs on your dashboard, ready to book, with an end date after which the access lapses.
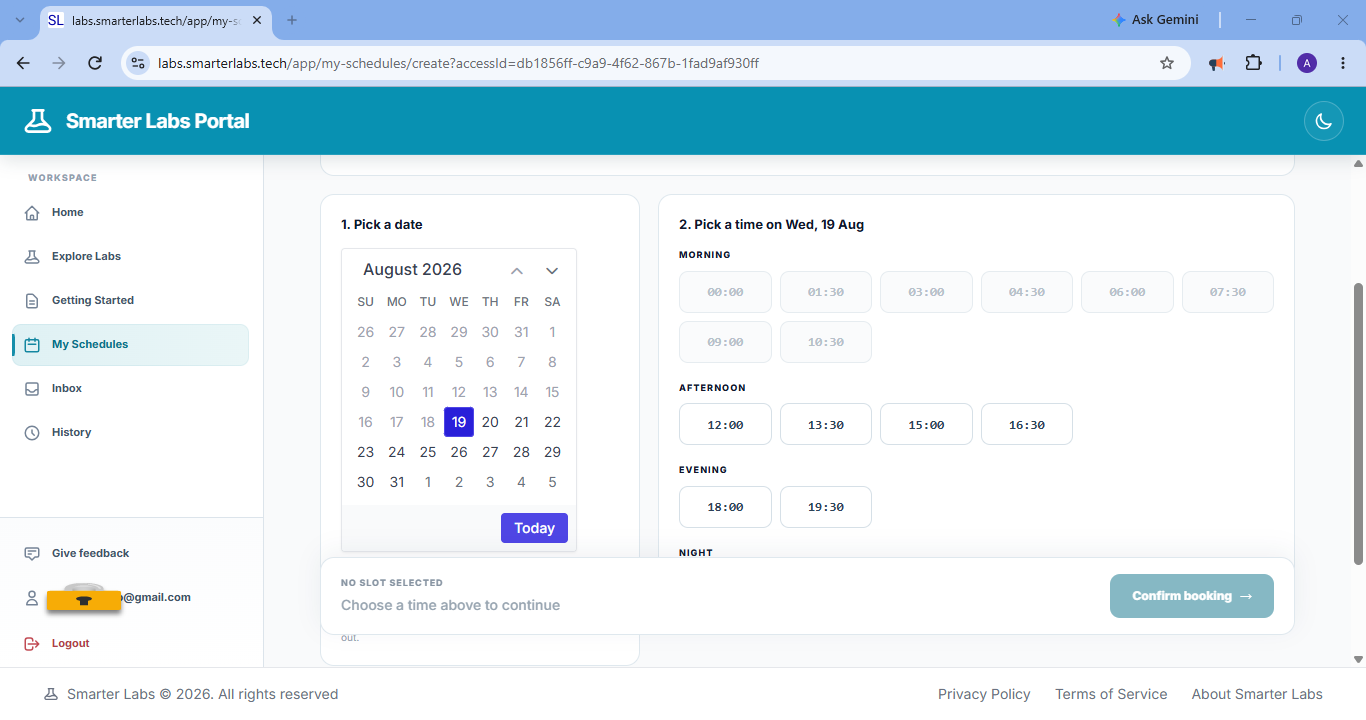
Pick a date, then pick a slot. Times another student already holds are crossed out, and Jump to next available slot finds the earliest free one if you have no preference. There are no fixed opening hours — the rigs can be booked around the clock. All times are shown in East Africa Time (UTC+3), and you get a confirmation email stating exactly when your session is.
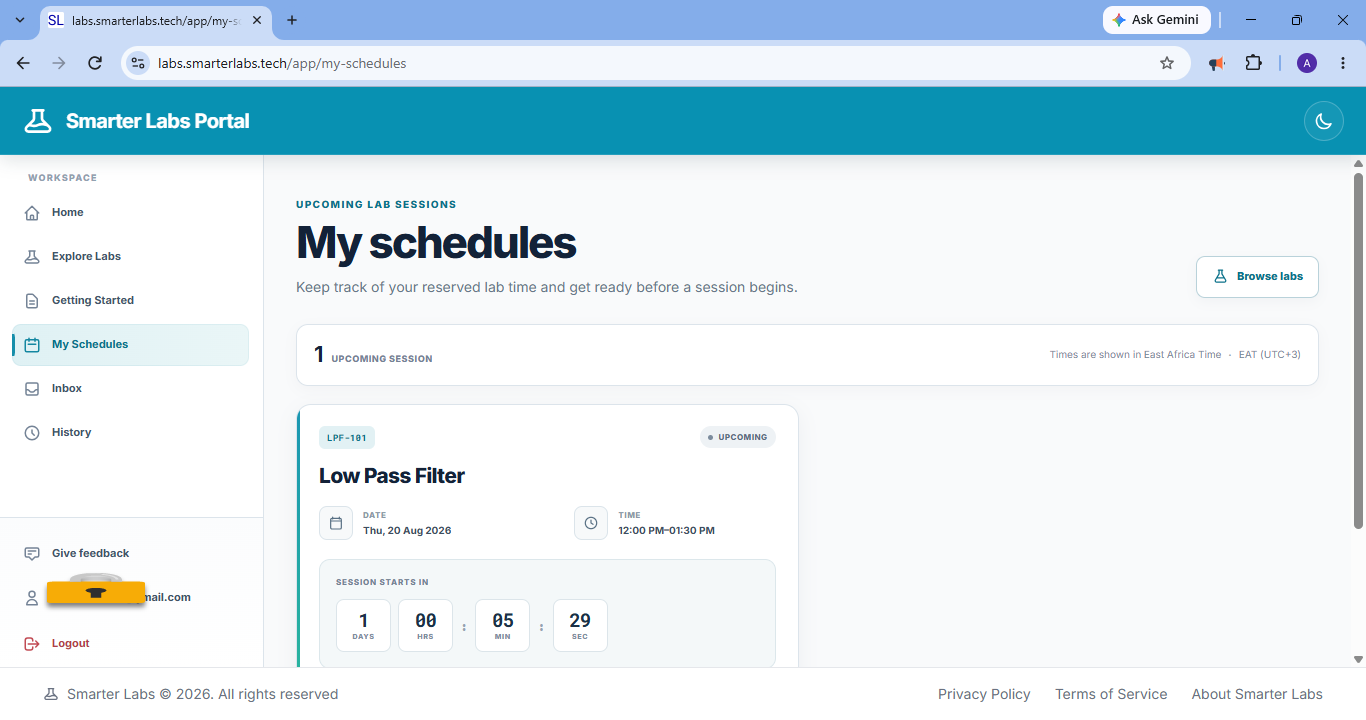
A reminder email goes out about an hour beforehand. Open My Schedules and you will see your booking counting down. Arriving early is fine — the page waits with you and opens the workbench by itself the moment your slot begins, so there is no need to watch the clock or keep refreshing.
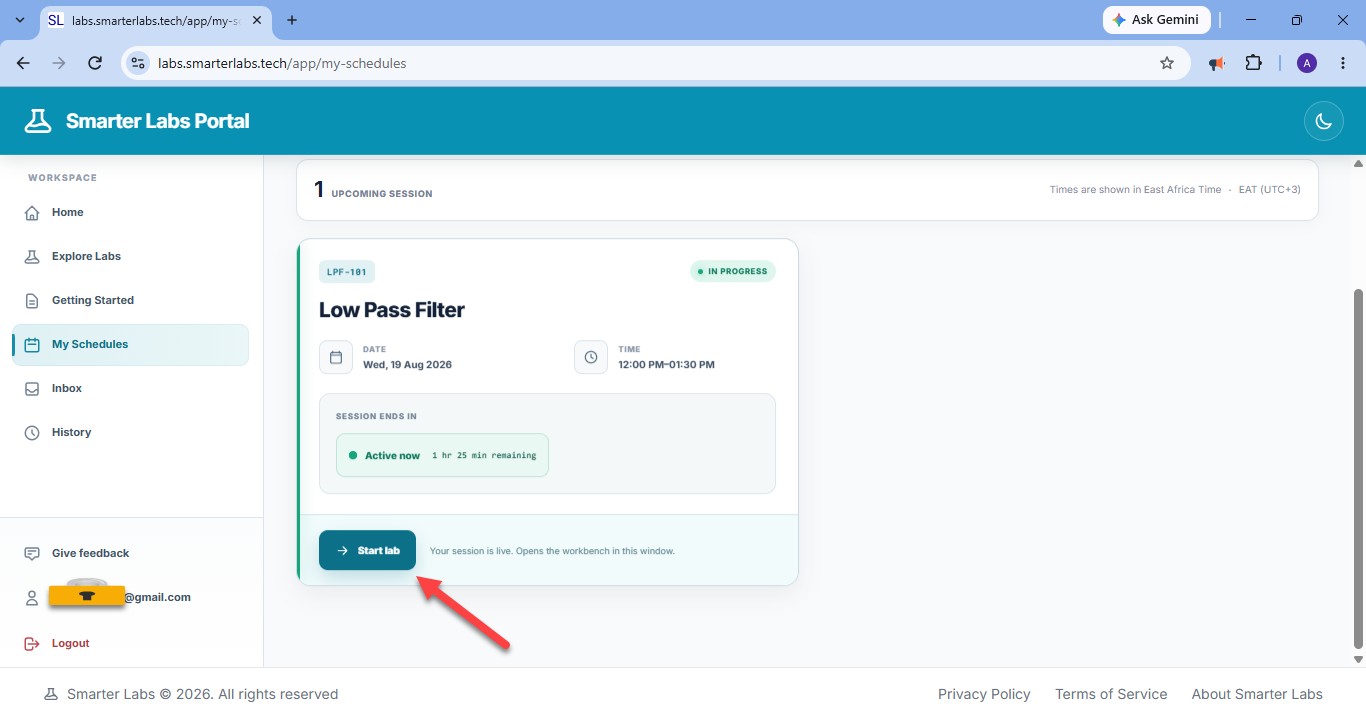
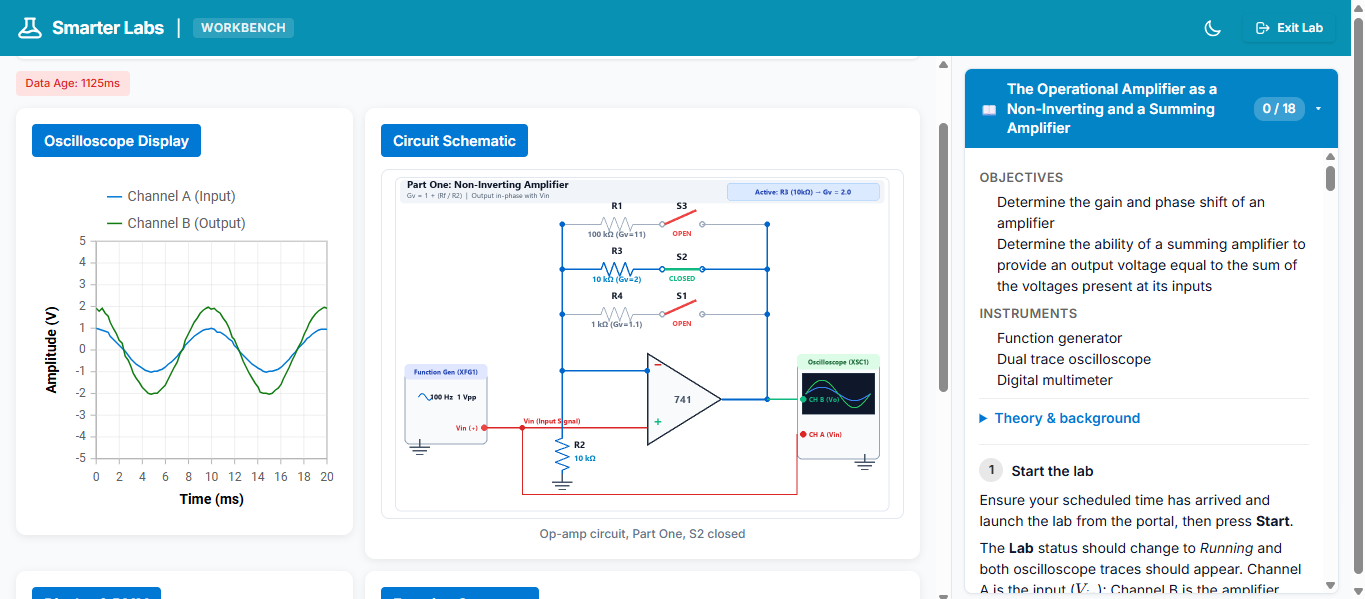
Press Start lab to open the workbench: an oscilloscope, a function generator, the circuit under test, and the lab manual beside them. Work through the manual step by step — where a step drives the hardware it can apply the settings for you, and the readings it takes are recorded as you go. SmartTA is on hand if a result does not look the way you expected.
Your session ends by itself when the slot runs out and the equipment is released for whoever is next. Afterwards, open History, find the session, and download Readings (CSV) — every measurement you captured, laid out ready to plot for your report.
The portal as it actually looks, in the order you meet it. Everything between these points is reading and measuring.
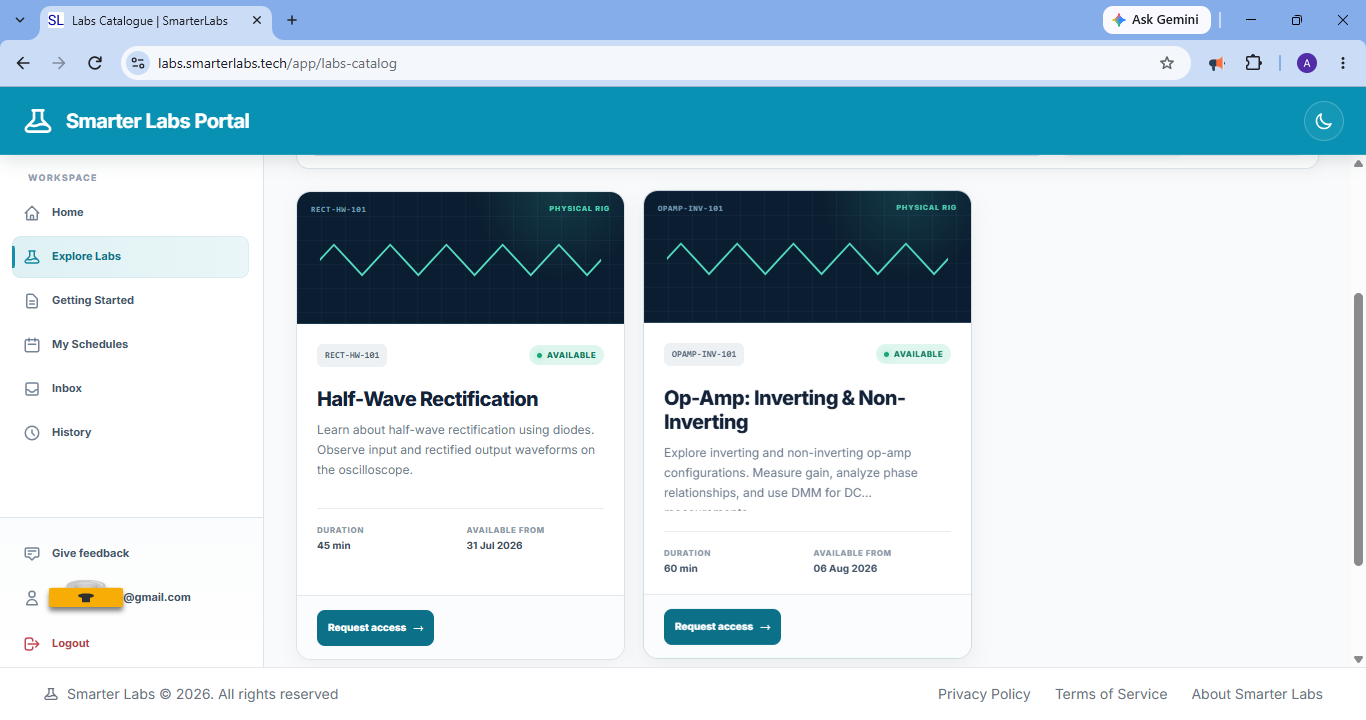
Each experiment says what it covers, how long a session runs, and when the rig became available. Request access to the ones your course needs.
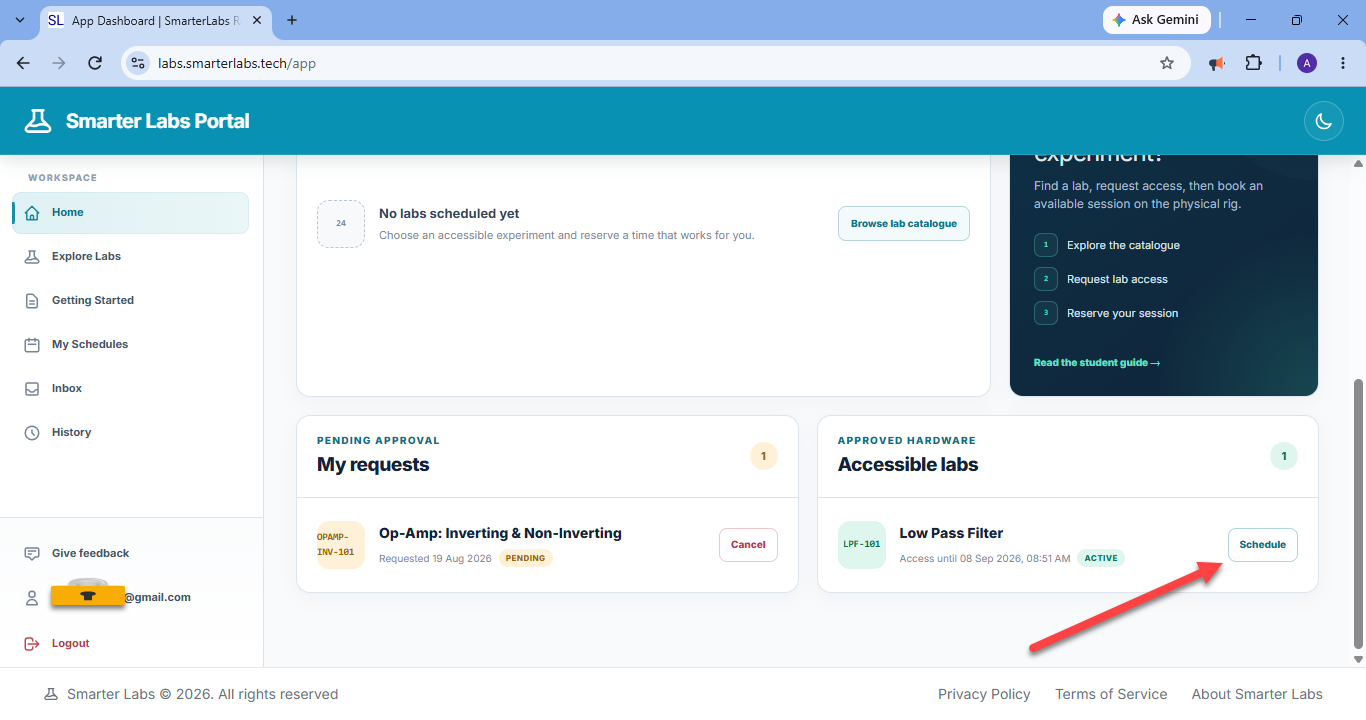
Approved experiments move to Accessible labs on your dashboard with the date your access lapses and a Schedule button. Anything still under review waits beside it under My requests.
Choose a date, then a time. Slots already gone or held by another student are greyed out, so what is left is what you can actually have. The rigs run around the clock — the evening and night blocks are real options, not filler.
The booking sits in My Schedules counting down to its start. All times are East Africa Time (UTC+3), stated on the page so there is nothing to convert in your head.
At your slot the card turns to In progress by itself and grows a Start lab button, with the time left in the session beside it. Nothing to refresh, nothing to install.
Live oscilloscope traces and the circuit under test on the left, the experiment's own manual on the right, ticking off steps as your readings are recorded. Where a step drives the hardware it can apply the settings for you.
Real equipment occasionally misbehaves, and timetables move. None of the situations below cost you your access to an experiment.
You cannot make your session Cancel it from My Schedules before it starts. The slot returns to the pool for other students and you can book a new time straight away.
The equipment is offline when your slot opens We cancel the booking for you and email to say so, rather than leave you at a workbench that cannot run. Your access is untouched — book again as soon as the rig is back, with no new request needed.
You lose connection mid-session The workbench reconnects on its own once your internet is back, and your progress and readings are kept. Watch the indicator at the top of the screen to see where you stand.
You neither attend nor cancel The session is recorded as missed. It stays visible in your history, and you will need to request access again to book another attempt.